If you reverse engineer network protocols or do any other network security stuff, you’ve probably needed to collect network traffic at least once – either to understand a protocol or look for sensitive information. Back in the good old days, this simply meant firing up tcpdump and watching those sweet, plaintext packets flow on by. Now, everyone has a stick up their butts about encryption – bunch of cry babies couldn’t handle getting their accounts hacked and their private info sold on the deep dark web for a few hundred dogecoin.
In today-time, doing any network analysis absolutely requires knowledge of HTTPS / SSL / TLS interception and it turns out to be non trivial almost all of the time! Of course, this makes sense because the entire point of TLS is to secure your communication. Like any other seldom trodden path, intercepting TLS has some caveats. First, you have to grok how Man-in-the-Middle works, how certificates work and how to install them on your system, how to massage your OS and certain apps into using those certs. Finally, you’ve got to navigate a bunch of proxy documentation and configuration to actually intercept and display the traffic.
In this post, I’ll be describing how to monitor the encrypted HTTPS traffic of a single app on macOS as well as solutions to some of the frustrating problems I encountered.
Overview
The process for intercepting traffic is as follows:
- Generate a root certificate
- Install the cert
- Use proxychains to proxy a specific app
- Use mitmproxy to intercept traffic
- Yell at your computer because it doesn’t work for reasons which are highly opaque
You get to skip step 5 since you’re reading this post. Congratulations.
Installing Stuff
Install proxychains the way you probably install everything else: by blindly brew install‘ing it, but add a little -ng at the end:
1 | brew install proxychains-ng |
There’s a slightly newer version forked on GitHub but I couldn’t be bothered to make it and the brew formula is conspicuously missing from the brew repo. What are you trying to hide, bro?
Create a proxychains.conf and add these lines:
1 | strict_chain |
The main important line is http 127.0.0.1 8080 which tells proxychains to redirect all traffic from the app to 127.0.0.1 port 8080, which is where we’ll be running mitmproxy.
Next, install mitmproxy with pip:
1 | # because I know you probably never upgrade pip and this is really just a test to see if you're paying attention and just copy / pasting everything |
Go ahead and start mitmproxy so it’ll be running (duh) and because it helpfully generates a root cert for you in ~/.mitmproxy:
1 | mitmproxy --host |
To install the certs, you have two options. First, the clicky-clicky method:
1 | open ~/.mitmproxy |
Then, press Command+Space and type Keychain Access. Next, double click mitmproxy-ca-cert.pem to install it. Or, you can drag it to Keychain Access. At this point, you should see something like this:
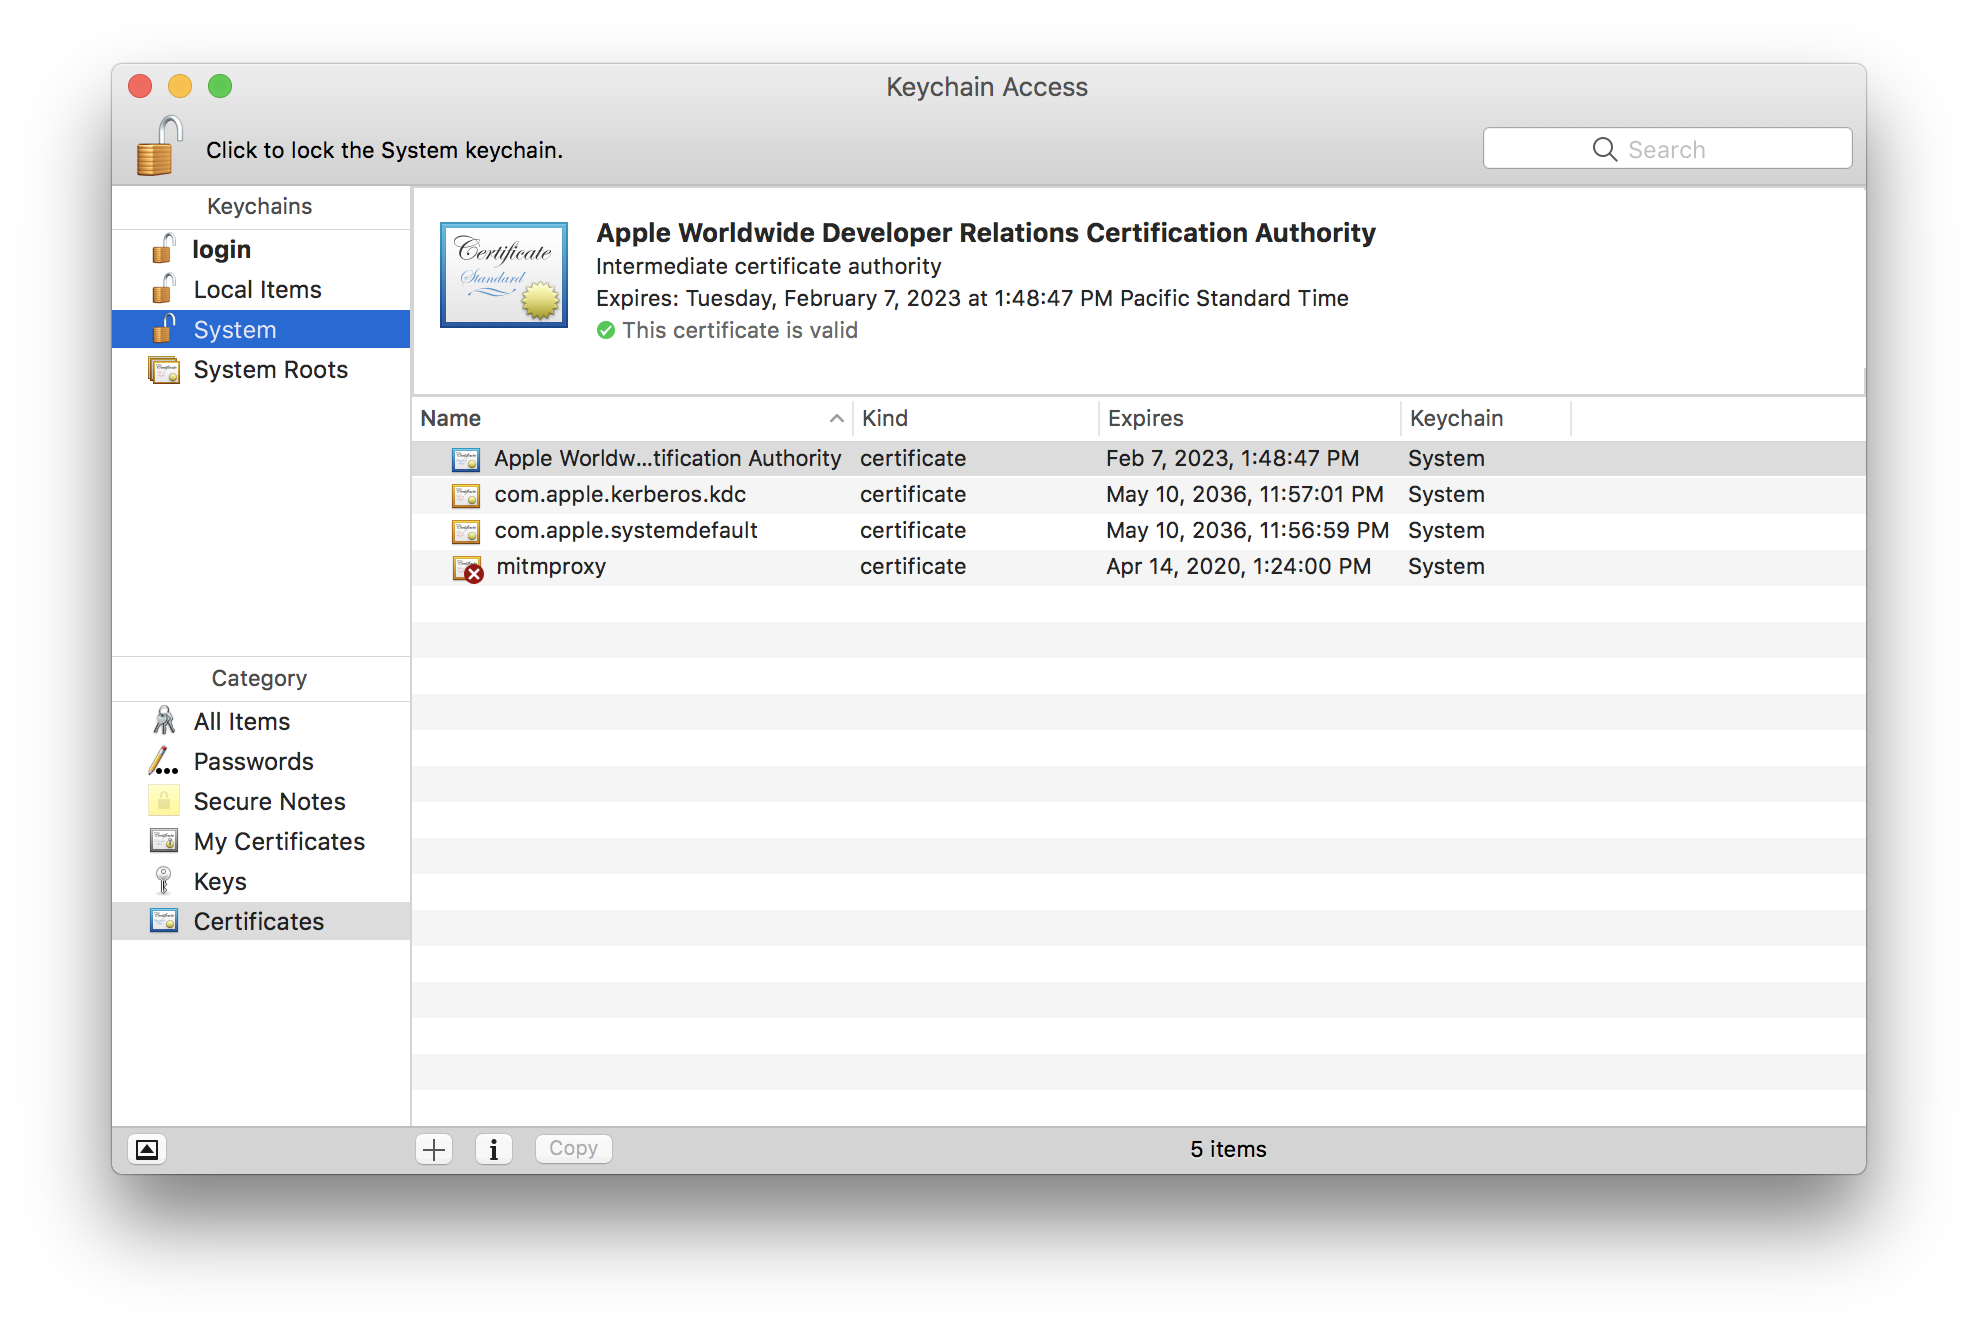
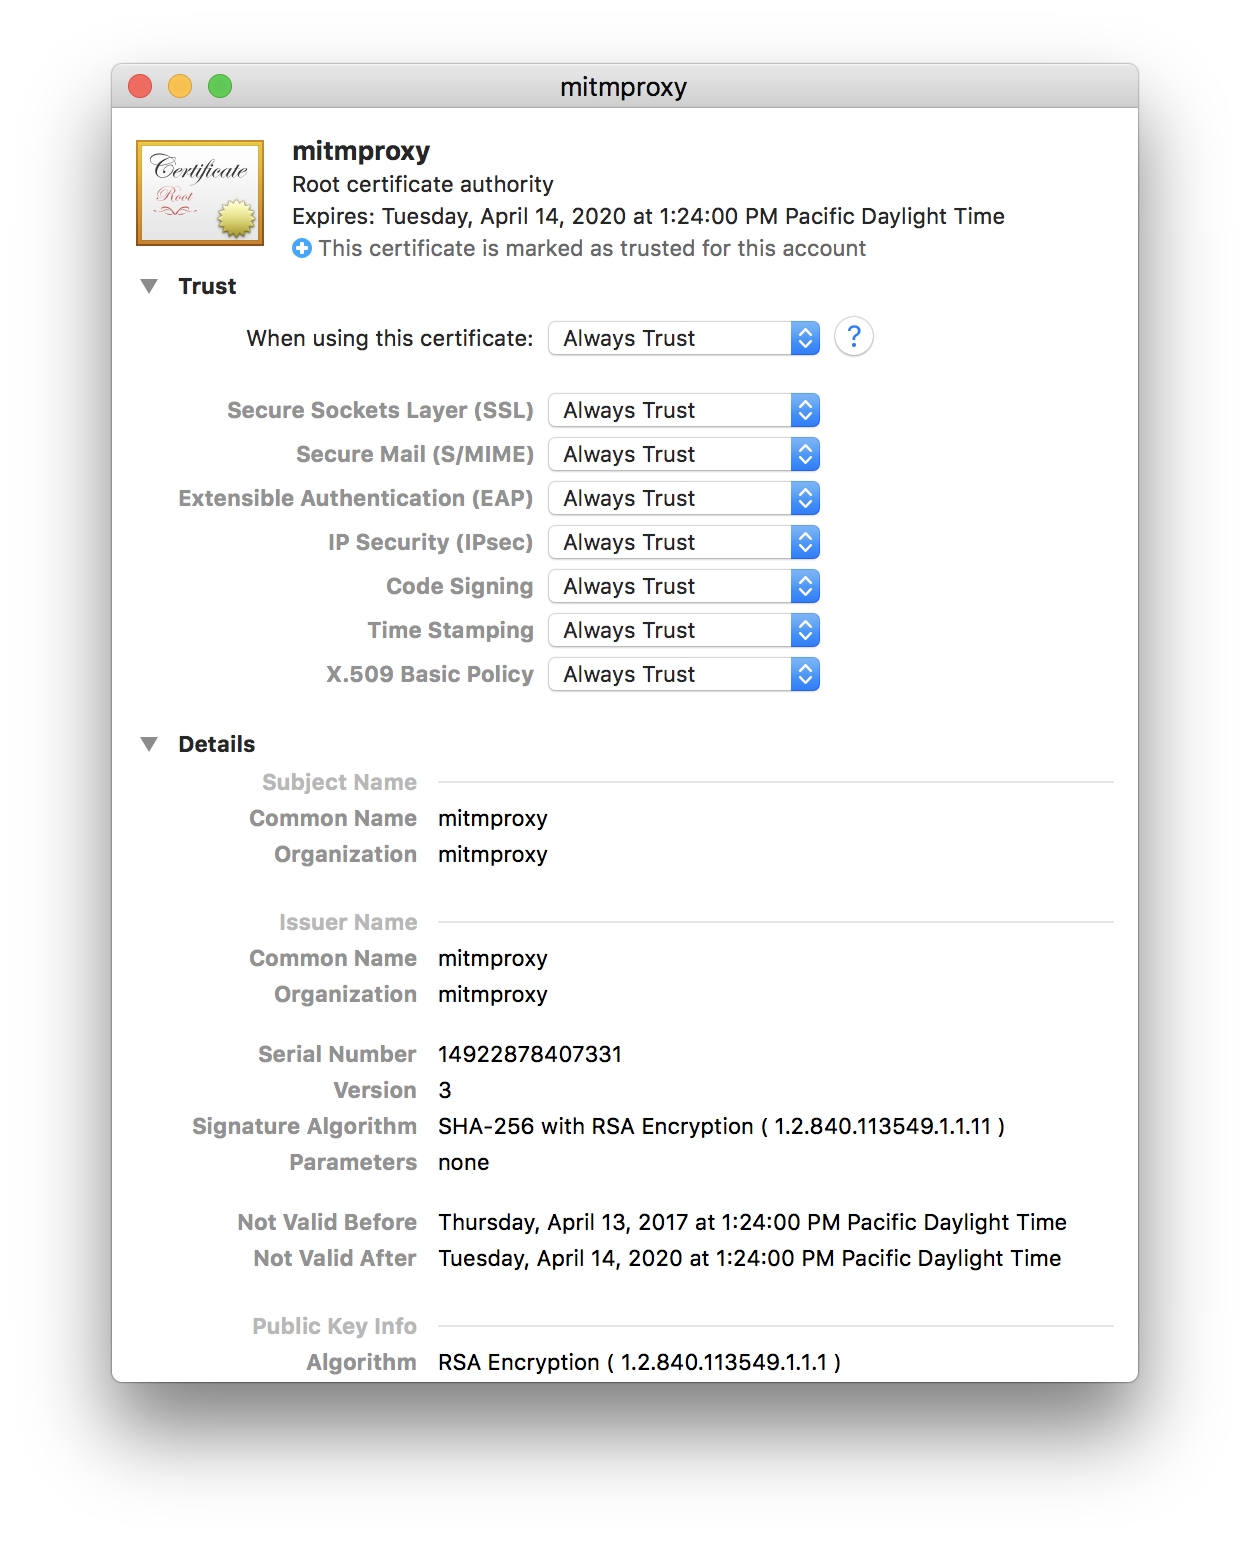
The cert is installed but it’s not trusted. To trust the cert, right click on it and select Get Info. Expand Trust and select Always Trust for When using this certificate. It should look like this:
The second install option is to just do it from the command line:
1 | sudo security add-trusted-cert -d -r trustRoot -k /Library/Keychains/System.keychain ~/.mitmproxy/mitmproxy-ca-cert.pem |
Finally, your cert should look something like this:
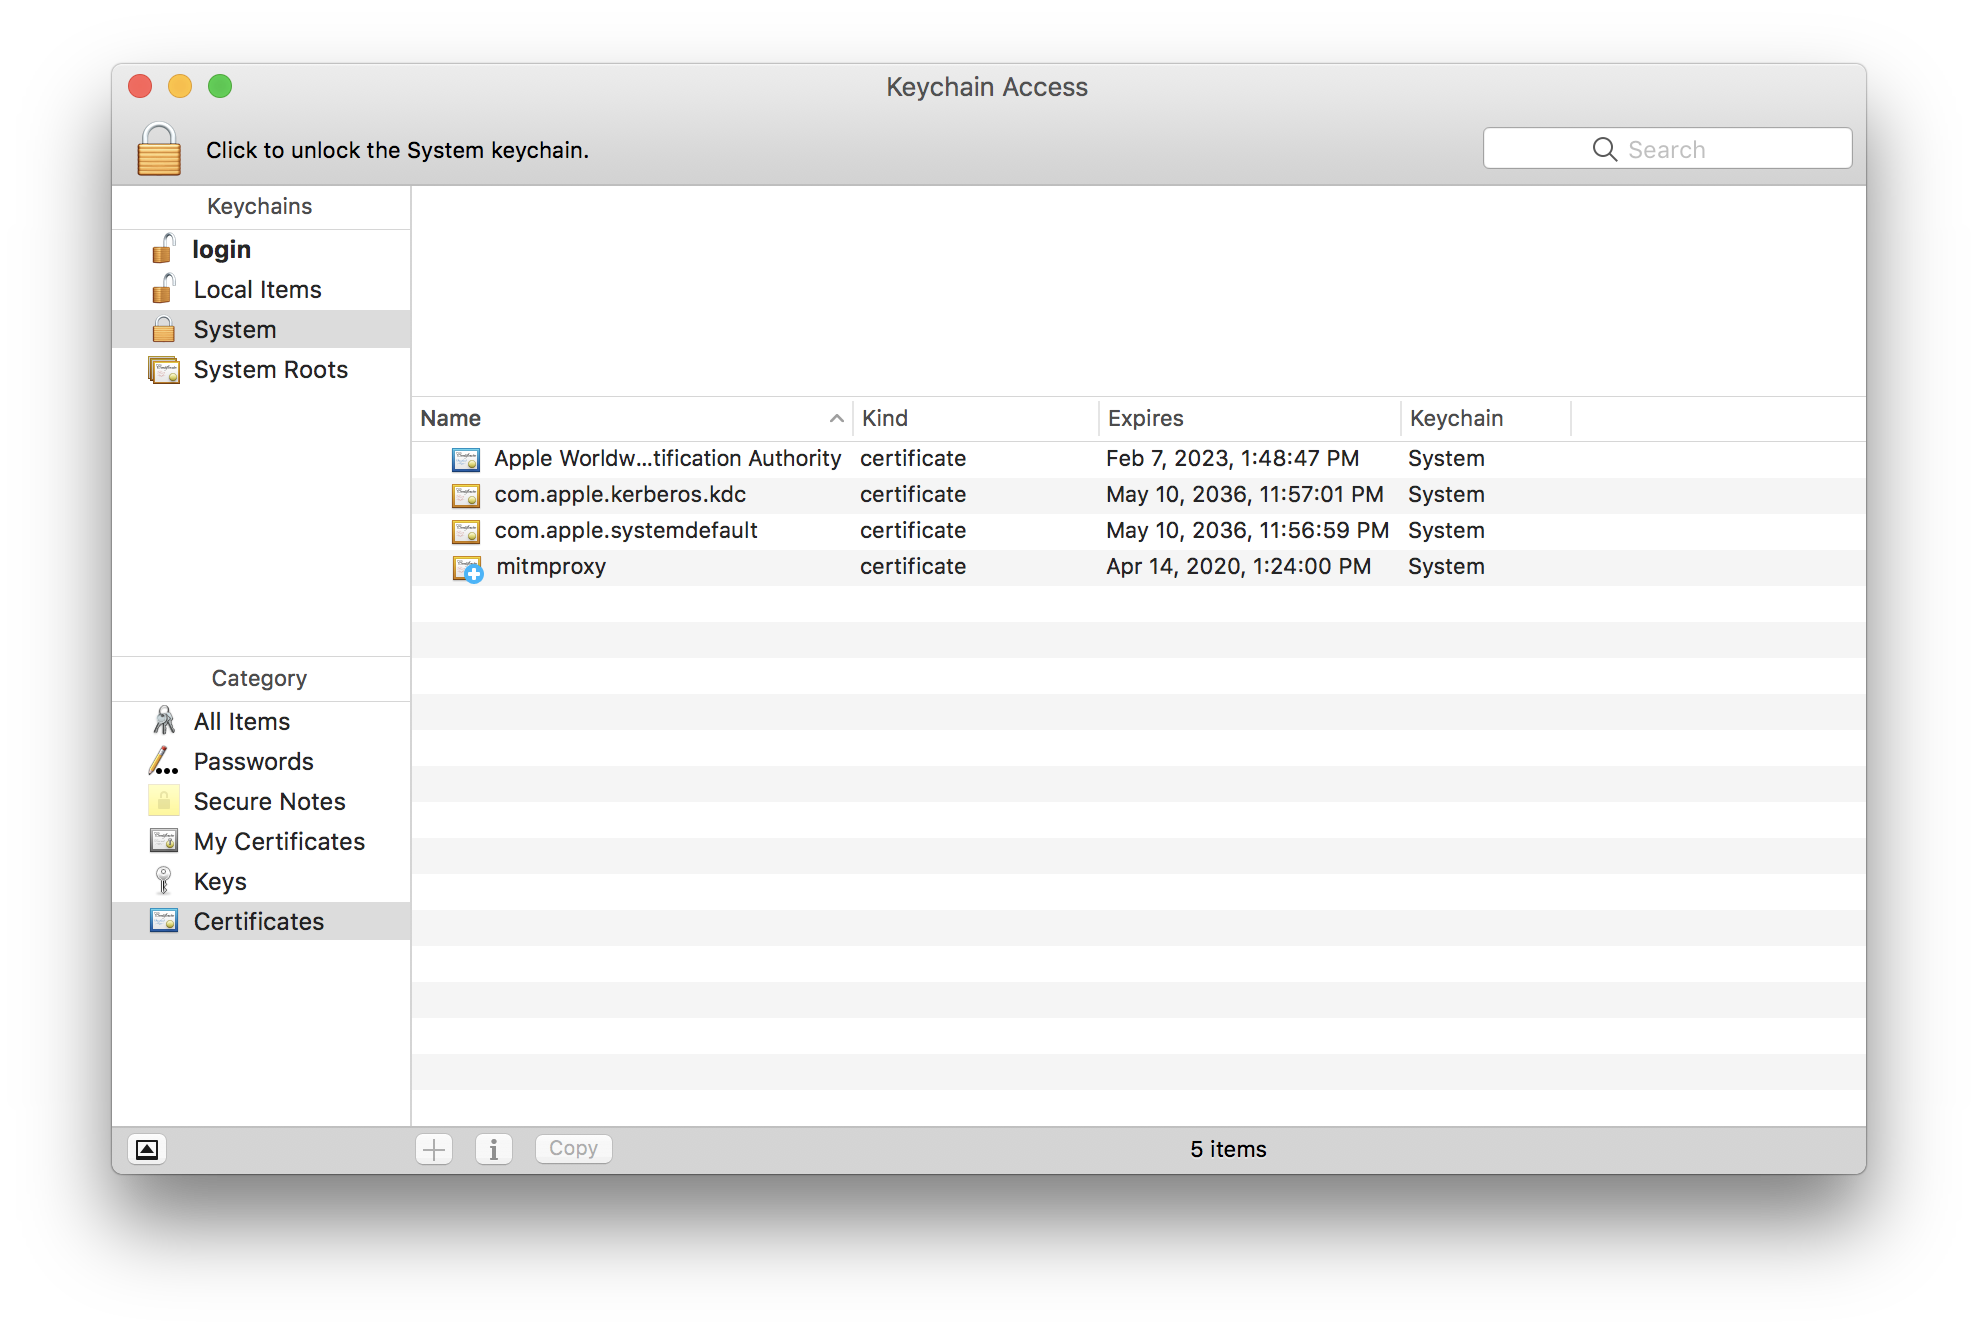
If you have any other certs than those in the screen shot, you may be backdoor’ed! The vans are on their way.
Using mitmproxy
The mitmproxy manual is very good and those people put a lot of work into the software and documentation, so I’m not going to explain it here. It’s also pretty simple to figure out and I’m not going to patronize you by holding your hand like you’re a little baby.
However, if you’ve never used mitmproxy before, you should know a few key bindings. The first two are obvious:
- UP and DOWN arrow keys are for navigation
- ENTER key enters the selected item
The other keys are less obvious:
- TAB switches between Request, Response, and Detail
- Q backs out of a selected item
Testing Everything
Now that you have a proxychains configuration pointed at localhost, the certs are installed, and mitmproxy is running, you’re ready to test stuff and see if it works!
1 | proxychains4 -f proxychains.conf curl https://calebfenton.github.io/ |
Now, check out mitmproxy and observe how there is no logged traffic. Hurray! It’s not working! But why is this? Because system apps silently ignore your bullshit. It has something to do with SIP not allowing proxychains to do it’s thing. You can work around this like so:
1 | cp `which curl` . |
Or you could just brew install wget and replace curl with wget and that should work because wget is not a system app.
Once you see traffic on mitmproxy, it means a lot is working: mitmproxy is correctly mitm’ing, your freshly installed backdoor root cert is respected, and proxychains is correctly hooking the right stuff. This is really good! Probably enough for most people, but I was trying to proxy some Python code. So, on to some possible problems with Python!
If you want to follow along, add these lines to req.py:
1 | import requests |
You may need to pip install requests if you hate yourself and don’t have requests installed already. This script basically does what curl does, except it prints out a lot less. Let’s try it with proxychains:
1 | $ proxychains4 python req.py # automatically finds proxychains.conf |
Python doesn’t give a shit about your certs. Hah! You can do a quick test that this is the case by changing the requests.get to include a verify parameter pointing to your cert:
1 | import requests |
This works fine because you’re telling the requests module to trust your mitmproxy cert.
What if you can’t be bothered to change your target app or maybe it uses something other than requests? You have at least two options:
- For requests, set
REQUESTS_CA_BUNDLEto point at your root cert, e.g.REQUESTS_CA_BUNDLE=/Users/caleb/.mitmproxy/mitmproxy-ca-cert.cer - For other modules, try setting
SSL_CERT_FILEwith the path to your root cert
For example, using the first version of req.py without verify:
1 | $ REQUESTS_CA_BUNDLE=/Users/caleb/.mitmproxy/mitmproxy-ca-cert.cer proxychains4 python req.py |
Summary
This post only covers a small number of the problems that can bite you when trying to mitm HTTPS. However, most of the time, I just need to proxy a single app and don’t want to use iptables or ipfw to redirect all traffic because 1.) that’s noisy and 2.) firewall rules are confusing and I don’t want to master that arcanum unless I have to, not ashamed to admit it. With this post, you should have everything you need to successfully proxy and monitor traffic of a single app on OSX (most of the time).
Good luck. Happy sniffing.